If I have learned anything in my 29 years on this planet, it's that life is a crap shoot. Sometimes you plot and plan and hum and haw forever about a decision that ends up making no difference in the long run. Other times you do something you think nothing of at the time, and it ends up pretty much changing your life. I'm sure she'll accuse me of exaggerating, but that's what happened when I met Dallas Curow.
Last June, I emailed Dal to see if she would be up for grabbing lunch and giving me a few photography pointers. I knew of her through work (our day jobs are at the same University), and when I saw some of her photography on our website I immediately online-stalked her to see what the rest of her work was like. I'd just bitten the bullet (finally) and purchased an SLR camera to get better pics of my projects. I'd taken a photography class to get started, but I still wasn't getting it, and I hoped she could help.
While I did end up leaving our lunch with pointers - some of the most useful stuff I'd learned thus far actually - the best thing I left with was the feeling that I'd just met a kindred spirit. Someone who was passionate about her work and about being creative. Someone who could get overwhelmed and teary eyed at the sight of something beautiful. Someone who didn't think the pursuit of the aesthetic was frivolous. Someone like me.
Why is any of this important? Well, for two reasons - one of them personal, and the other design related.
First, because I had recently gone through what for all intents and purposes was a divorce. I'd ended a very long-term relationship, cut my losses in terms of all of our joint friends and moved to a city where I knew virtually no one. I was starting from scratch. Meeting Dallas, and subsequently all of her amazing friends, was like a breath of fresh air after a long winter. Dal has surrounded herself with lovely like-minded people, and with these people - with this group - I felt at home for the first time in a long while.
By making that lunch date I had inadvertently put myself on the path back to calm. Back to me. I had missed it.
Secondly, and likely more significantly for anyone reading this blog, it's important because it turns out that when you get Dal and I together (and now our super talented friend Jenn as well), some pretty awesome things happen. A little while after we met I was looking at a styled wedding shoot on a blog I follow, and I shot Dal an email asking if she'd ever thought of photographing one. Turns out the answer was a huge yes, and my offer to help was happily accepted.
Neither of us knew what we were doing at first, but for me (and I'm pretty sure for her too) that was half the fun. And I do mean fun. This is the type of stuff I do for shits and giggles. I'm not established enough yet for it to be for publicity, or anything else like that. It's for the sheer joy of it. I could die happy dreaming of colour combinations and fabric textures and wallpaper patterns. I'm guessing Dal could die happy dreaming of patches of perfect light and natural, romantic poses. It's why we work so well together. We just. plain. love it.
We've since done two styled shoots and are planning our third (this one's going to be a doozy). I was going to do a post about the first one combined with this introduction, but realized pretty fast that I had too much to say about all of it for that to work, so I'll put up a post about the Fall Shoot tomorrow. I've loved every minute of creating these, and can't wait to share them with you.
Dal, I will forever be grateful to have met you, and that you chose to bring me into the fold of the Montreal gang. For any of you who would like to check out more of Dallas' incredible work, please visit her blog. You'll be happy you did :)

 |
| Some of Dallas' beautiful work |
Last June, I emailed Dal to see if she would be up for grabbing lunch and giving me a few photography pointers. I knew of her through work (our day jobs are at the same University), and when I saw some of her photography on our website I immediately online-stalked her to see what the rest of her work was like. I'd just bitten the bullet (finally) and purchased an SLR camera to get better pics of my projects. I'd taken a photography class to get started, but I still wasn't getting it, and I hoped she could help.
While I did end up leaving our lunch with pointers - some of the most useful stuff I'd learned thus far actually - the best thing I left with was the feeling that I'd just met a kindred spirit. Someone who was passionate about her work and about being creative. Someone who could get overwhelmed and teary eyed at the sight of something beautiful. Someone who didn't think the pursuit of the aesthetic was frivolous. Someone like me.
 |
| A portrait and makeup tutorial (yes, she does that too) |
Why is any of this important? Well, for two reasons - one of them personal, and the other design related.
First, because I had recently gone through what for all intents and purposes was a divorce. I'd ended a very long-term relationship, cut my losses in terms of all of our joint friends and moved to a city where I knew virtually no one. I was starting from scratch. Meeting Dallas, and subsequently all of her amazing friends, was like a breath of fresh air after a long winter. Dal has surrounded herself with lovely like-minded people, and with these people - with this group - I felt at home for the first time in a long while.
By making that lunch date I had inadvertently put myself on the path back to calm. Back to me. I had missed it.
Secondly, and likely more significantly for anyone reading this blog, it's important because it turns out that when you get Dal and I together (and now our super talented friend Jenn as well), some pretty awesome things happen. A little while after we met I was looking at a styled wedding shoot on a blog I follow, and I shot Dal an email asking if she'd ever thought of photographing one. Turns out the answer was a huge yes, and my offer to help was happily accepted.
 |
| The portrait session we did for my "about" section. She made this shy girl feel so good I practically skipped home. |
Neither of us knew what we were doing at first, but for me (and I'm pretty sure for her too) that was half the fun. And I do mean fun. This is the type of stuff I do for shits and giggles. I'm not established enough yet for it to be for publicity, or anything else like that. It's for the sheer joy of it. I could die happy dreaming of colour combinations and fabric textures and wallpaper patterns. I'm guessing Dal could die happy dreaming of patches of perfect light and natural, romantic poses. It's why we work so well together. We just. plain. love it.
We've since done two styled shoots and are planning our third (this one's going to be a doozy). I was going to do a post about the first one combined with this introduction, but realized pretty fast that I had too much to say about all of it for that to work, so I'll put up a post about the Fall Shoot tomorrow. I've loved every minute of creating these, and can't wait to share them with you.
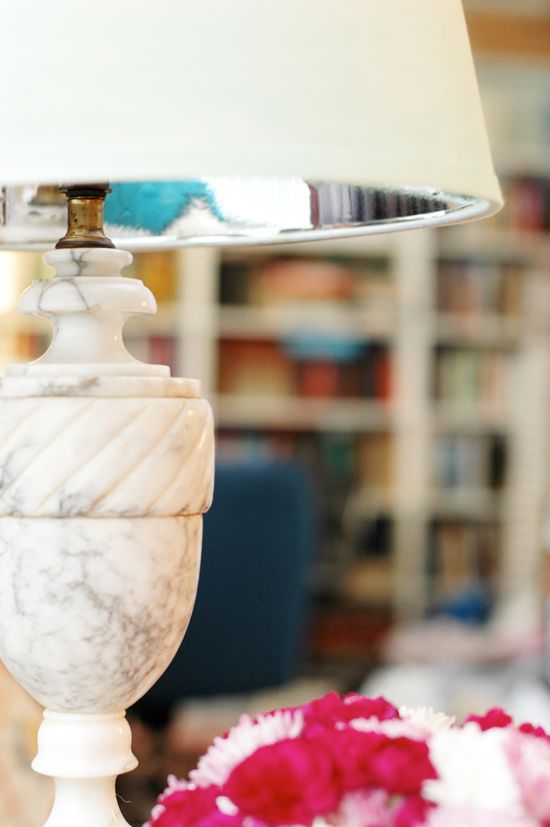
 |
| Sneak peak from the Fall Shoot |
Dal, I will forever be grateful to have met you, and that you chose to bring me into the fold of the Montreal gang. For any of you who would like to check out more of Dallas' incredible work, please visit her blog. You'll be happy you did :)